With a WordPress website, you may find plenty of ways to generate a satisfactory amount of income. But did you ever try a conventional way? WordPress ads are acquiring a lot of attention these days out of plenty of options in your hand.
Undoubtedly, ads are an excellent way to generate income. While some businesses use advertisements for their passive income, others have made it the primary source of income.
Unless you have enabled an ad blocker, you are most likely to see an ad everywhere on the internet, whether embedded into the content or placed on the top or side of a page. In this post, let’s find out how you can put ads on your WordPress website.
What are ads?
Generally, a banner ad is tracking engagement or impressions. That means you can make money through a specific number of visitors viewing your ad (Cost per 1,000 impressions) or when somebody clicks on the ad (Cost per click) using a WordPress ads plugin.
Where to put ads on the website?
Adding ad banners on a WordPress website is quite an easy task. This can be done seamlessly by inserting an ad into the sidebar with the help of WordPress widgets. To do so, go to Appearance >> Widgets in the WordPress dashboard.
Once there, you can easily drag and drop a text widget to the adequate area and paste the ads manager code there. Many advertisers are making use of the best ad management plugins to monetize their WordPress websites.
But first, you need to be able to get your application approved for a partner program with a major brand network to maximize your website's revenue. One of the networks with the best CPM in the market and no difficulty in registering is Adsconex.
- Read more about Registration and verification process with Adsconex
Once your domain has been approved on Adsconex, you will start generating ad codes to deploy it on your website.
1. How to create ad code on Adsconex after domain has been approved?
After submitting your site approval request. It takes some time for Adsconex to approve your site to start displaying ads. Once the domain has been approved, you can start generating ad codes to deploy to the positions on the website/article.
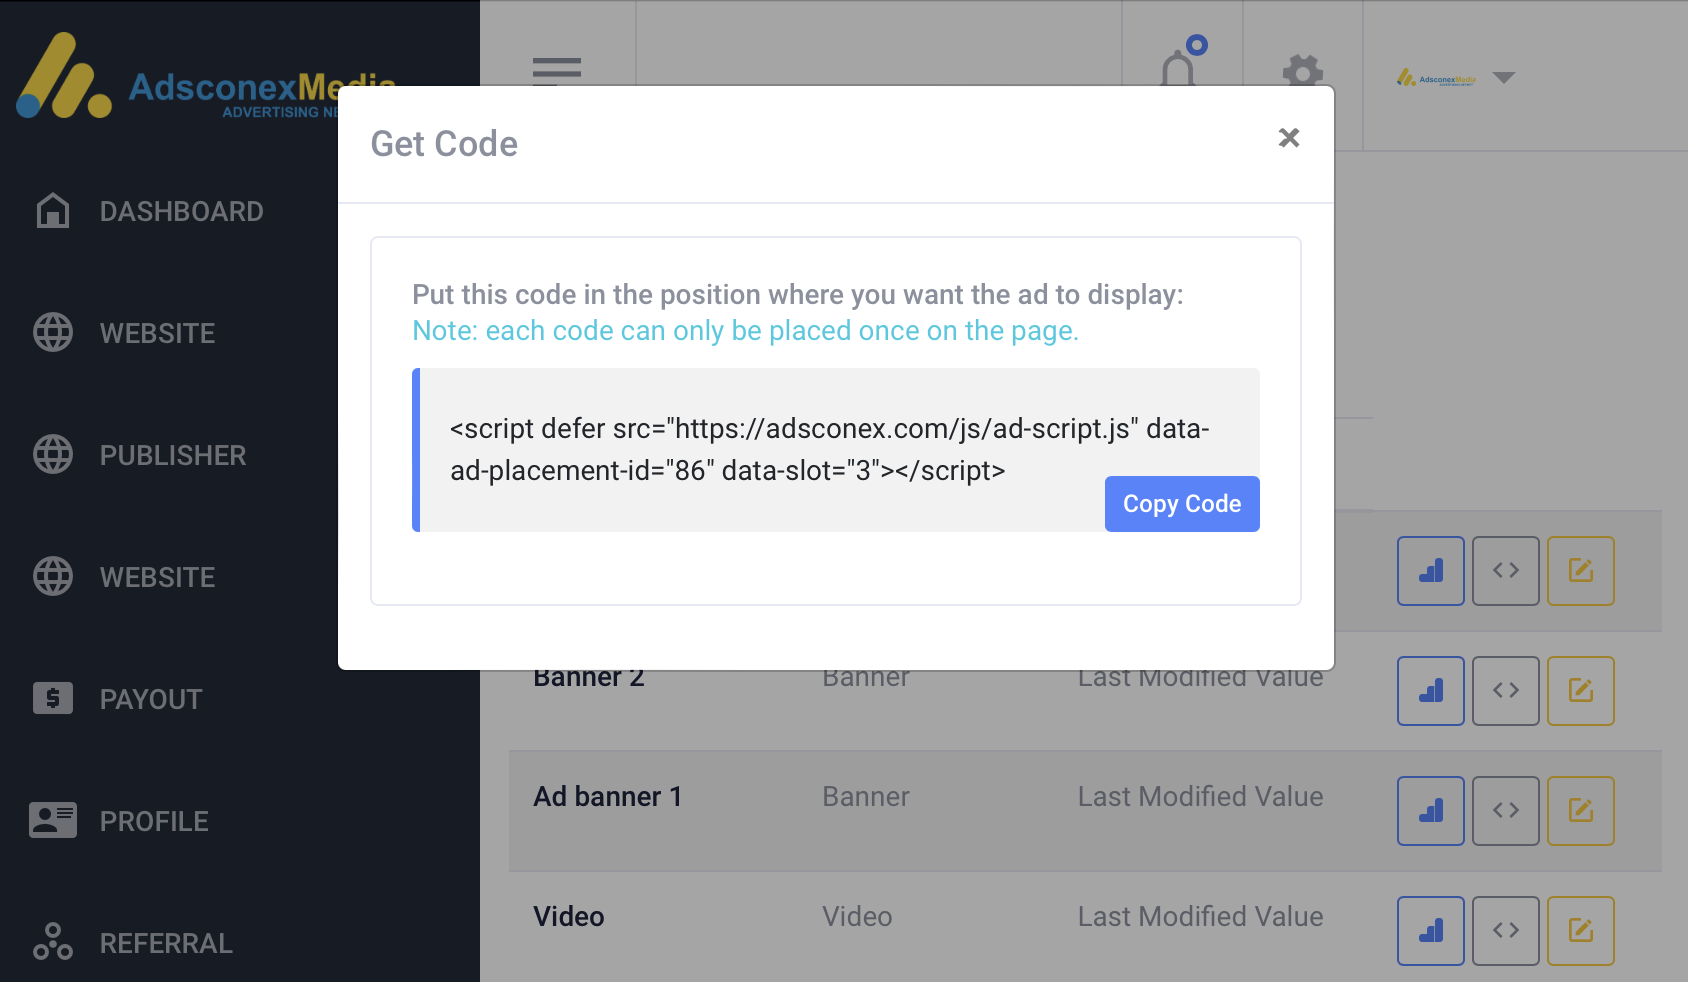
To get started, go to the WEBSITE Menu, click Get code on the approved domain to start generating ad codes.
 In this article, I am going to guide for banner ads, so I will choose the ad format as Responsive Banner and enter a name for the ad code that will be created now.


The remaining steps are very simple. Click on the "get code" icon to display the ad code. Click copy and deploy the ad code as instructed in part 1 of this article.
2. Within the Content of the Page using a Plugin:
To make things simple, I chose the Ad inserter Plugin. To get started, you need to search for the Plugin with the phrase Ad insert and start installing.
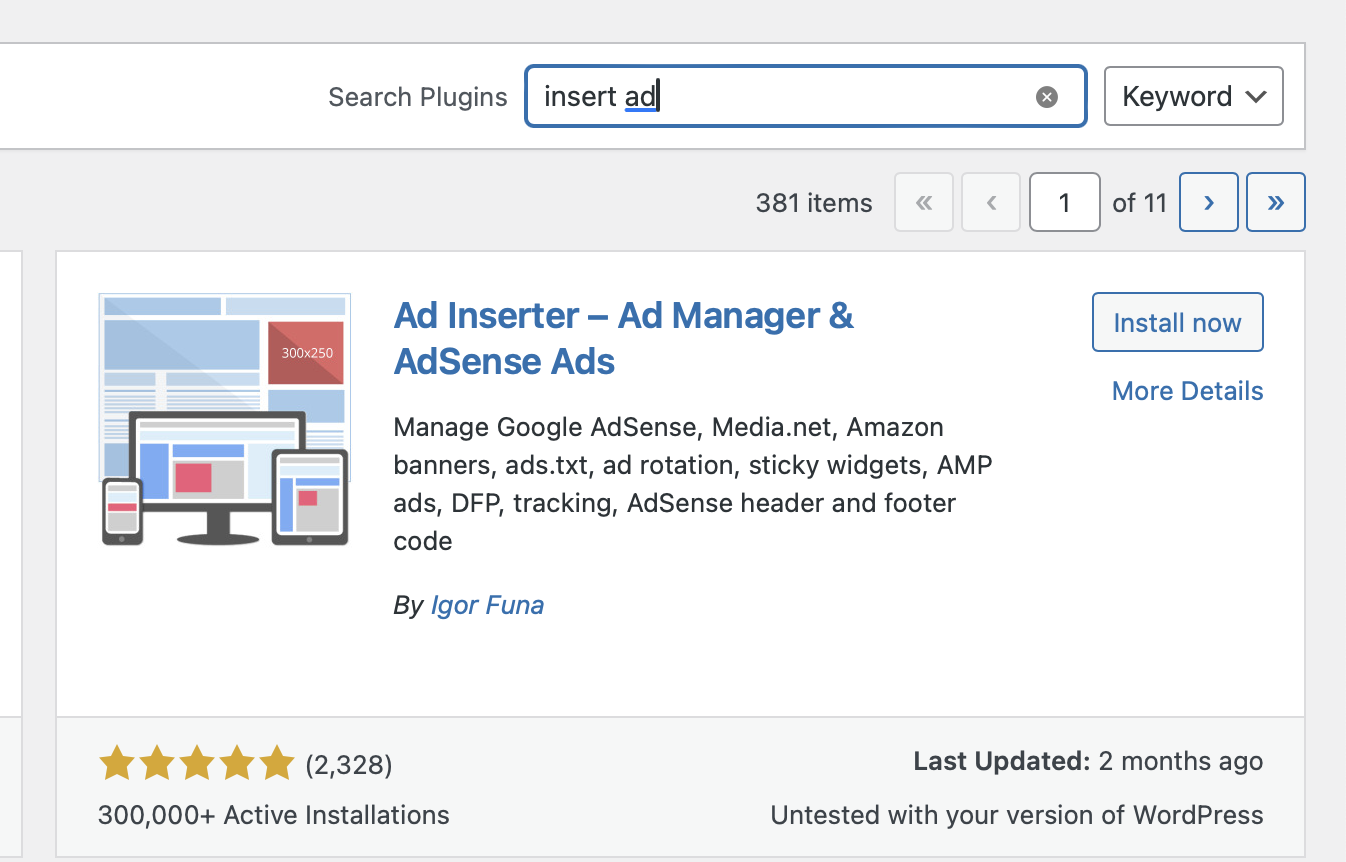
After installing the Plugin, you can start deploying ad codes to the Plugin. For ad codes, you have previously taken from ad networks or available ad codes. In this tutorial, I will use ad codes generated from Adsconex ad network.
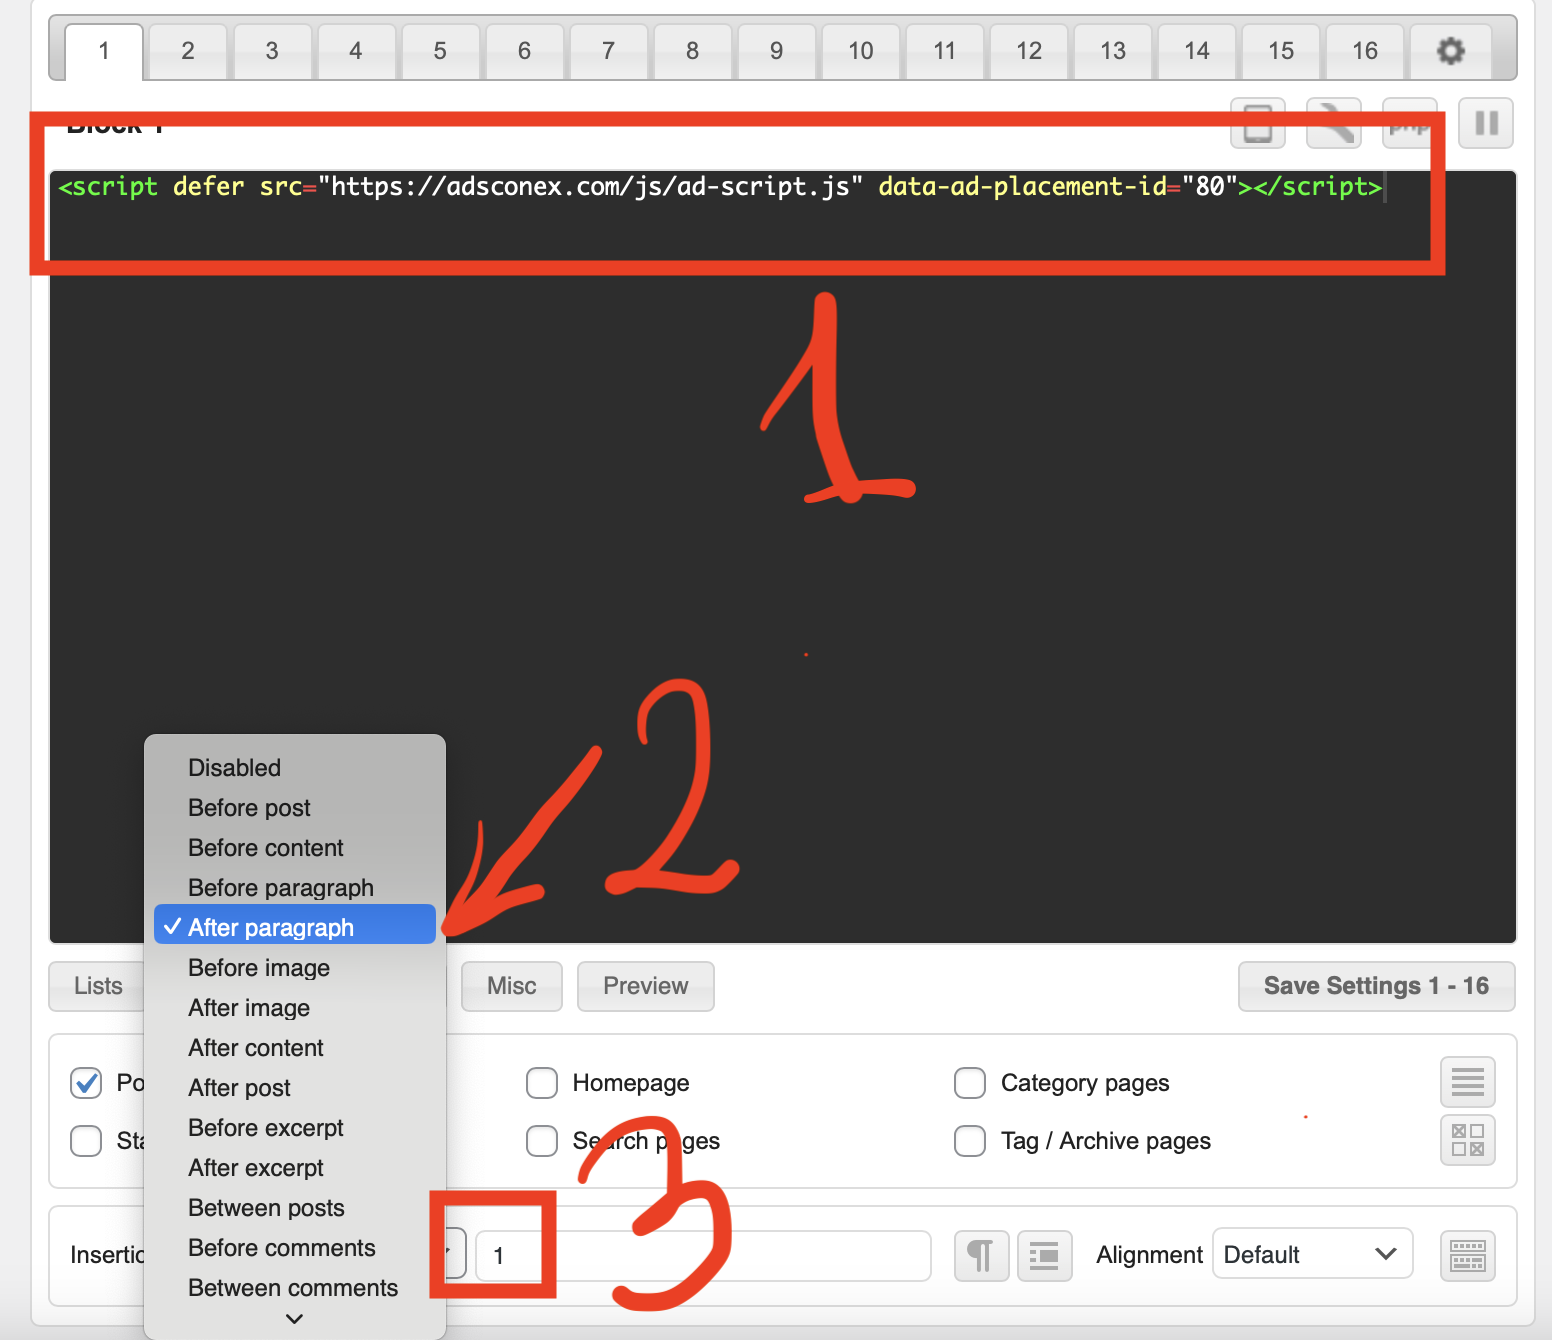
- Paste your ad code into this area.
- Select where the ad will appear. Here, I will choose the position in the article because I used a banner ad code to display.
- Where the ad will appear in the article, enter a number to understand that the ad will appear after that paragraph.
In this article I will only guide you about banner ad code. In addition, you can do the same with other ad formats with different positions for better efficiency, such as video ads, Intersetial ads.
Once you have deployed your ad code and settings, select Save Setting.
