Creating a personal blog is one of the most effective ways to establish an online presence, share your expertise, and connect with a wider audience. Among the many blogging platforms available today, Blogbio has become popular because of its simplicity and accessibility. It allows anyone to set up a free blog without technical barriers, making it especially attractive for beginners, small businesses, and personal brands.
In this guide, you will learn how to:
- Sign up for a Blogbio account
- Create and customize your blog
- Publish your first post
In the end, you will not only have a free Blogbio site, but also have the knowledge to make the best use of it.
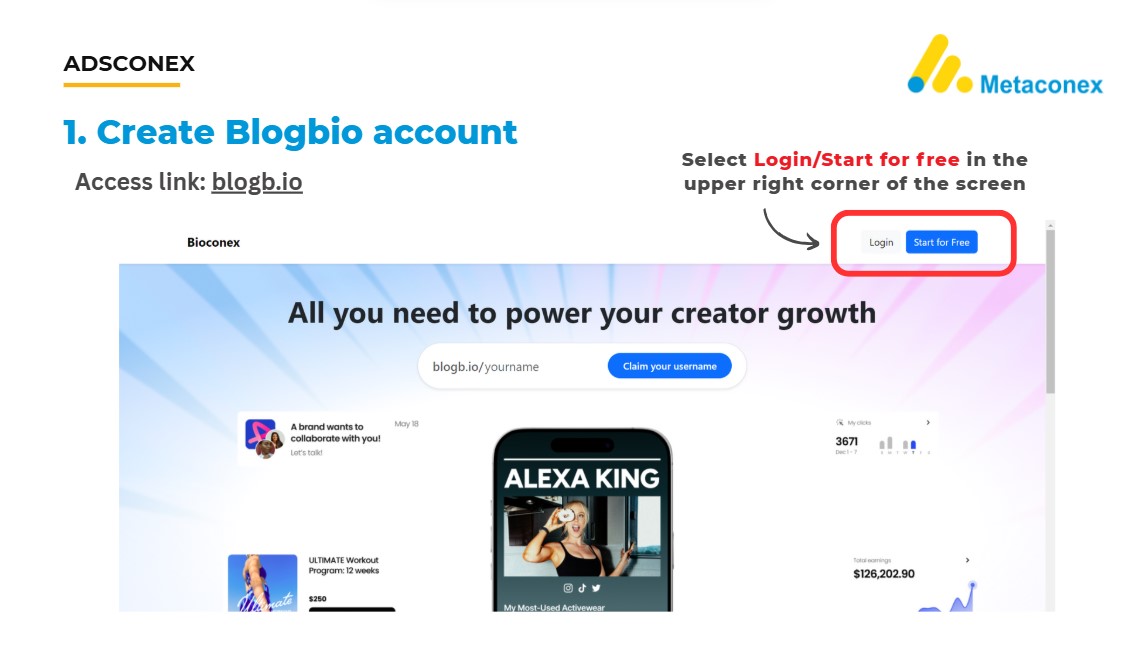
Step 1: Create a Blogbio Account
- To get started, visit the official Blogbio website at blogb.io.
- On the homepage, look at the upper right corner of the screen.
- You will see two options: Login or Start for Free.
- If you are new to Blogbio, click Start for Free to create a new account.
This will take you to the registration page, where you can begin setting up your free Blogbio profile.
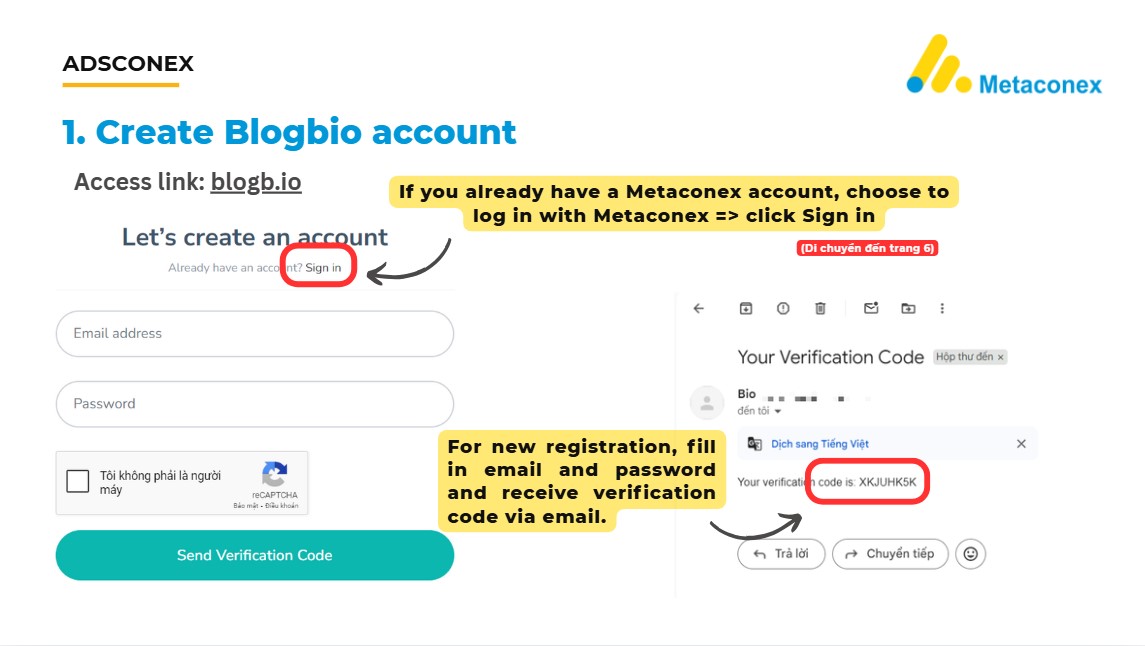
Step 2: Register or Sign in to Blogbio
Once you click Start for Free, you will be directed to the account creation page. Here, you have two options
- If you already have a Metaconex account:
- Simply click Sign in.
- Enter your Metaconex login details, and you’ll be connected directly to Blogbio.
- For new users:
- Enter a valid email address and create a password.
- Complete the security check (captcha).
- Click Send Verification Code.
- Check your email inbox for a verification code from Blogbio, and enter it to confirm your account.
This quick verification process ensures your Blogbio account is secure and ready for setup.
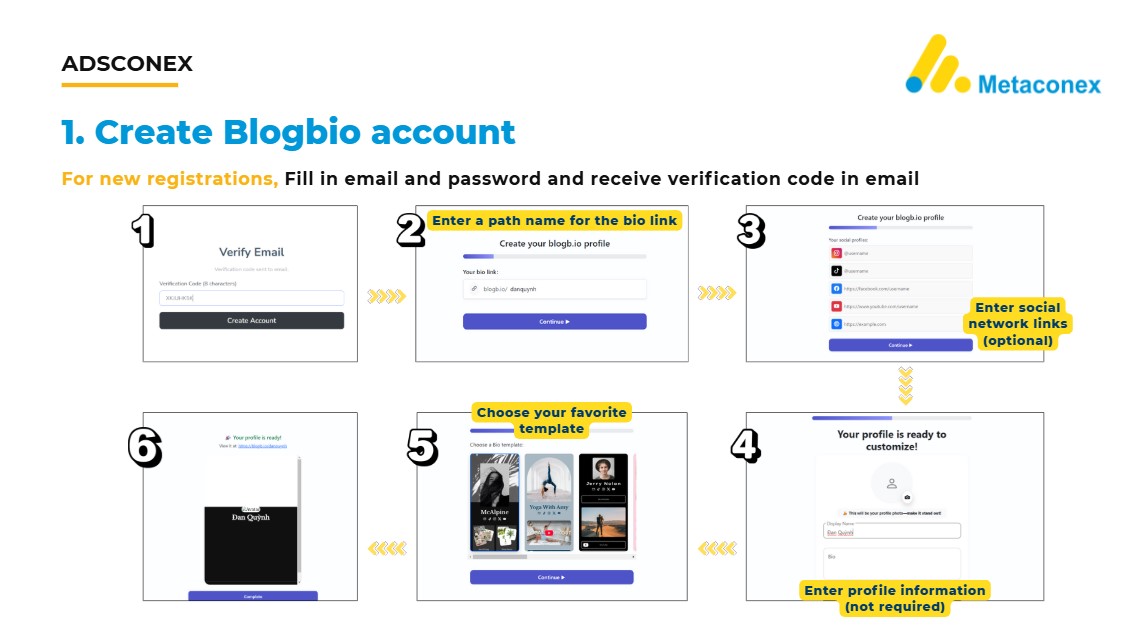
Step 3: Complete Your Blogbio Profile Setup
After verifying your email, Blogbio will guide you through a quick setup process:
- Enter a Path Name
- Choose a unique username or path for your bio link (e.g.,
blogb.io/yourname). - This will be your public link, so keep it short, clear, and professional.
- Choose a unique username or path for your bio link (e.g.,
- Add Social Media Links (Optional)
- You can connect your social platforms such as Instagram, YouTube, Facebook, or TikTok.
- This helps centralize your online presence and makes it easier for followers to find you.
- Enter Profile Information (Optional)
- Add a display name, short bio, or profile picture.
- While not mandatory, filling in these details helps personalize your profile.
- Choose a Template
- Blogbio offers multiple design templates.
- Select one that fits your personal brand or content style.
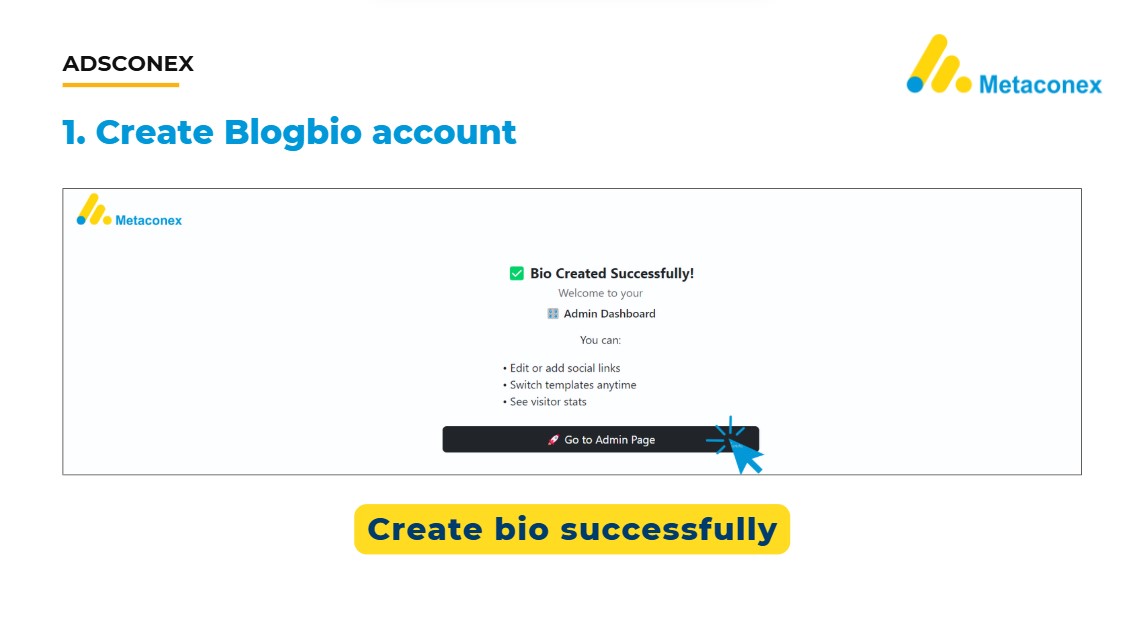
- Finish Setup
- Once everything is completed, Blogbio will confirm your profile is ready.
- You can now start customizing and creating your free blog content.
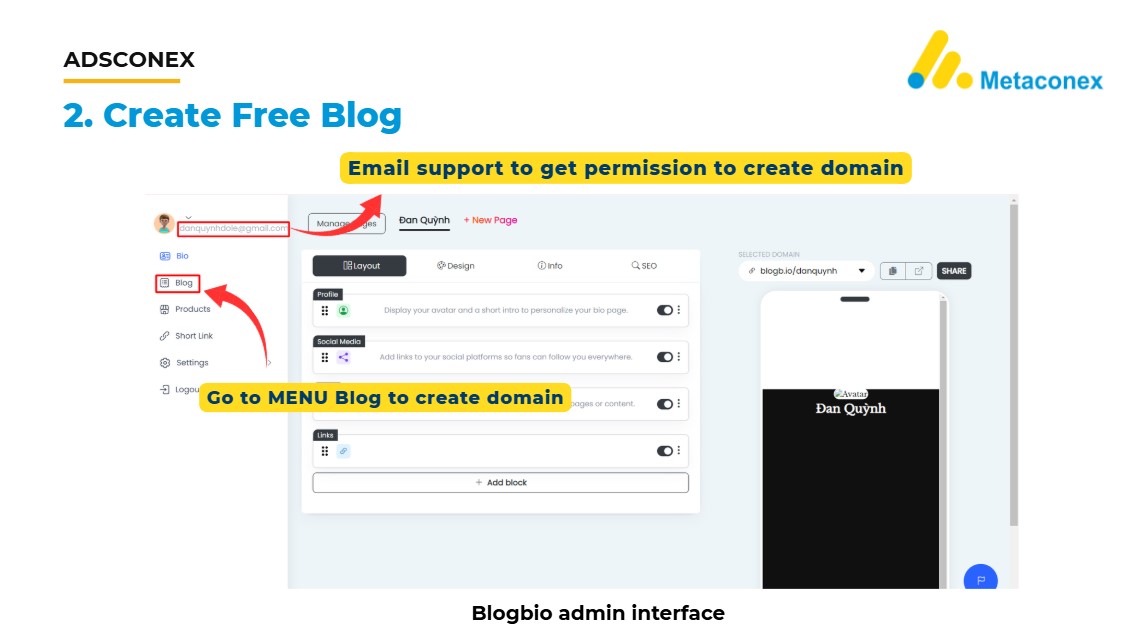
Step 4: Create Your Free Blog on Blogbio
Once your profile is ready, you can start setting up your blog.
- Go to the Blog Section
- In the Blogbio admin interface, find the left-hand side menu.
- Click Blog to begin creating your blog domain.
- Request Blog Creation Permission
- Blogbio requires email verification to activate the blog domain feature.
- Send an email to Blogbio support using the email linked to your account.
- Once approved, you will be able to publish and manage your blog.
This step ensures that only verified accounts can create blogs, helping maintain content quality and security across the platform.
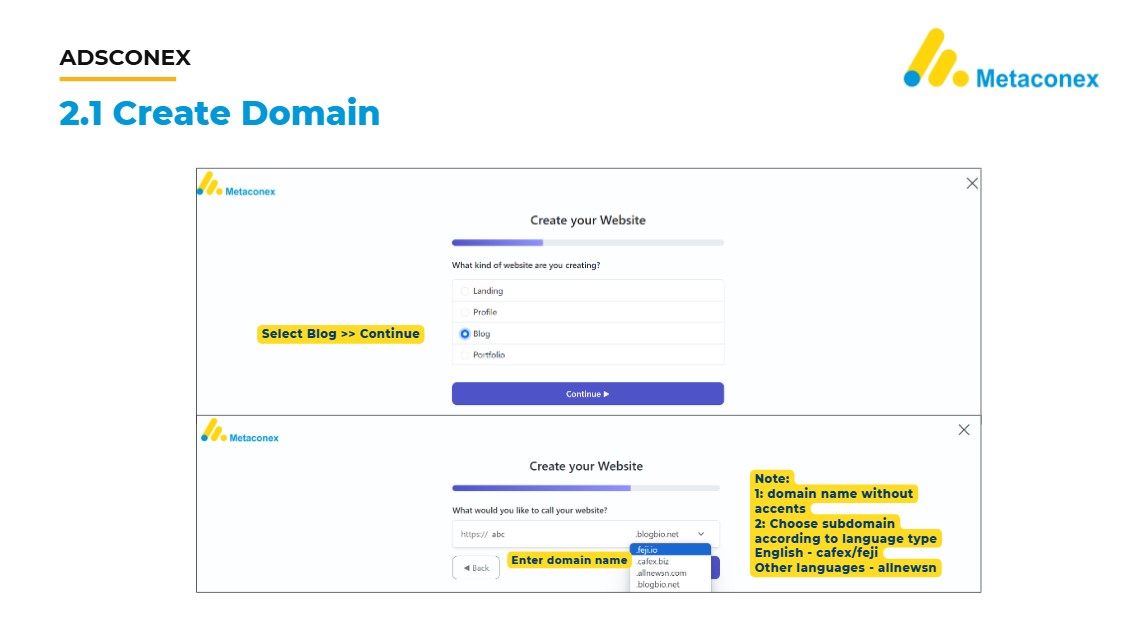
Step 5: Create Your Blog Domain
After receiving permission from Blogbio support, you can now set up your domain:
- Select Blog Type
- In the setup window, you’ll be asked what kind of website you are creating.
- Choose Blog and click Continue.
- Enter a Domain Name
- Type in the name you want for your blog.
- Make sure it is simple, professional, and easy to remember.
- Domain Naming Rules
- Do not use accents or special characters in your domain name.
- Choose a subdomain according to your language:
- For English blogs → use options like cafex or fejio
- For blogs in other languages → use options like allnewsn
By setting up a clear and relevant domain, your blog will be easier for readers to find and remember.
Step 6: Finalize Blog Domain Setup
Once you have chosen your domain name, the final step is to complete the setup:
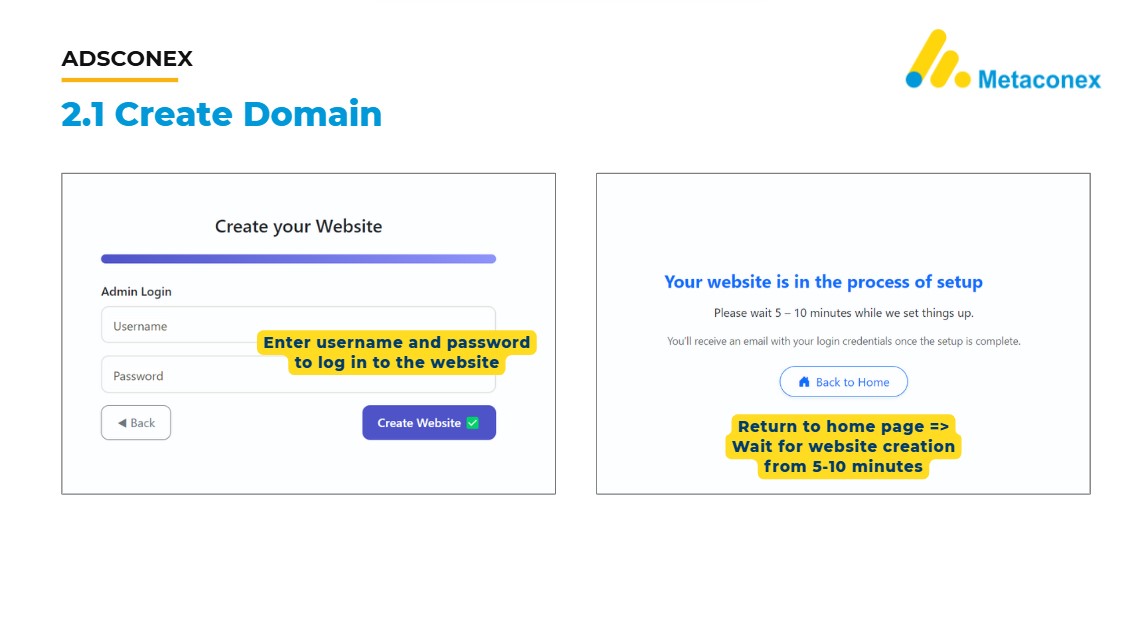
- Set Admin Login Credentials
- Enter your desired username and password.
- These credentials will allow you to log into your Blogbio website’s admin panel.
- Keep this information secure, as it gives you full control of your blog.
- Create Your Website
- Click Create Website to begin the setup process.
- Blogbio will configure your domain and initialize your blog.
- Wait for Setup Completion
- A confirmation screen will appear, letting you know that your website is being created.
- The process usually takes 5–10 minutes.
- Once finished, you will receive an email with login credentials to access your blog.
After this step, your Blogbio free blog is live and ready for customization and publishing.
Step 7: Activate Domain & Retrieve Access
After submitting your domain setup, you need to wait until your website status changes:
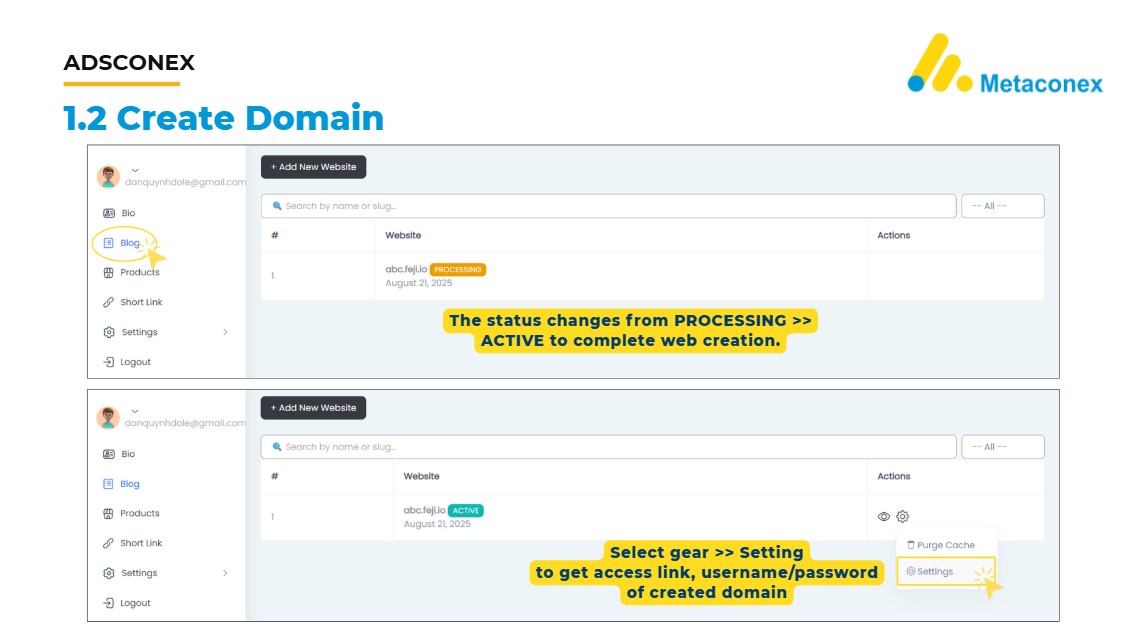
- Check Website Status
- Go to the Blog menu in the left sidebar.
- You’ll see your created domain listed with a status indicator.
- At first, it will show PROCESSING. Once setup is complete, it will change to ACTIVE.
- Access Domain Settings
- When the domain becomes ACTIVE, click the gear icon (⚙) next to your website.
- Select Settings from the dropdown menu.
- Retrieve Login Credentials
- In the settings, you’ll find the admin login link, username, and password for your domain.
- Use this information to access your blog’s admin dashboard and start publishing content.
Now your Blogbio free blog domain is fully created and ready for customization.
How to Access Your Blogbio Site
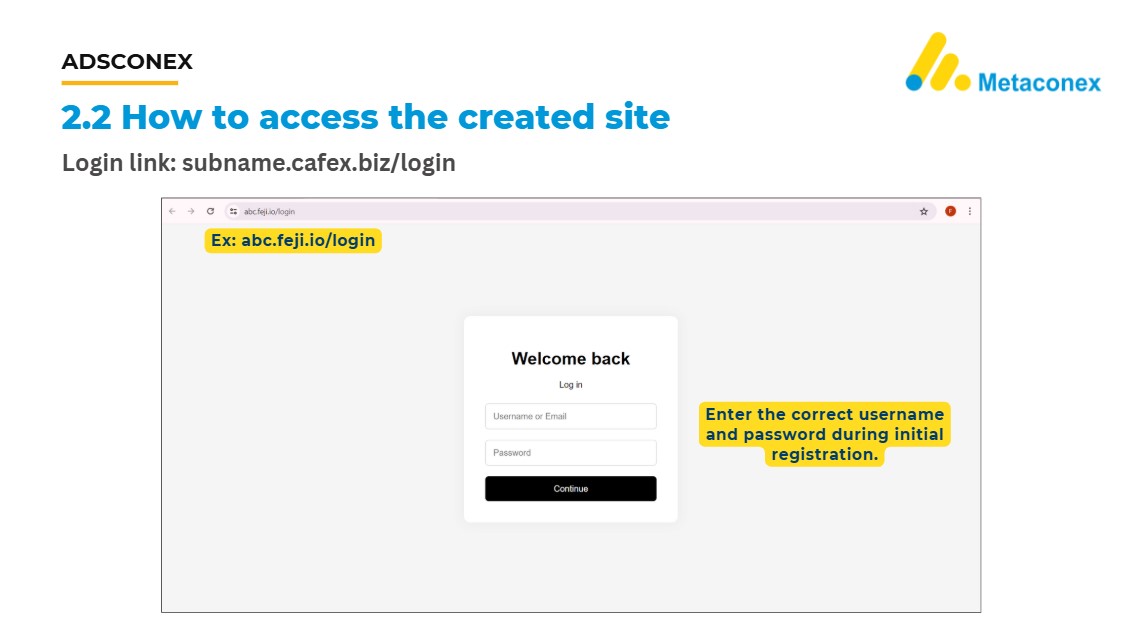
Once your domain is active, you can access your website’s admin dashboard using the login link.
- Login Link Format:
subname.cafex.biz/login
Example: abc.feji.io/login
- Login Credentials:
- Enter the username and password that you created during the domain setup process.
- If correct, you will be redirected to the Blogbio admin dashboard where you can start customizing and publishing content.
This is the final step to access and manage your free Blogbio blog.
Step 8: Explore the Blogbio Writing Interface
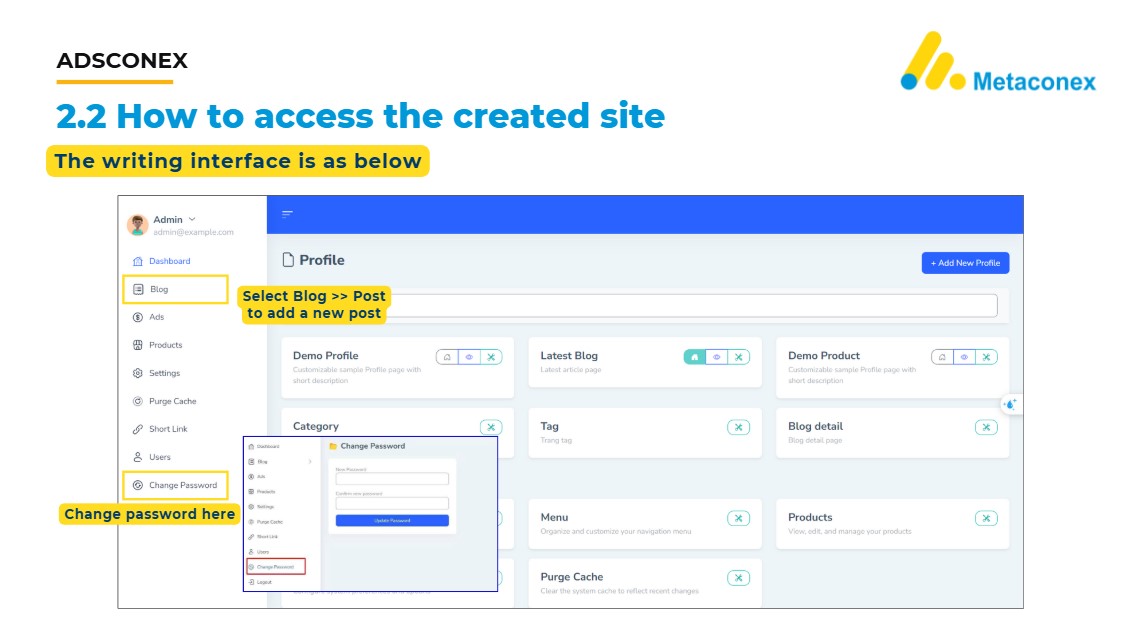
Once you log in to your Blogbio admin dashboard, you will see the writing and management interface.
- Create a New Blog Post
- From the left sidebar, select Blog → Post.
- This is where you can add a new article, manage categories, and edit your blog content.
- Manage Profile & Categories
- The dashboard allows you to manage your profile, tags, blog details, menus, and even products if needed.
- Each section can be customized to suit your blog’s structure and audience.
- Change Your Password
- For security, go to the sidebar and click Change Password.
- Enter a new password and confirm it to secure your account.
At this stage, your Blogbio blog is fully functional. You can start writing articles, customizing design, and building your personal brand or business blog for free.
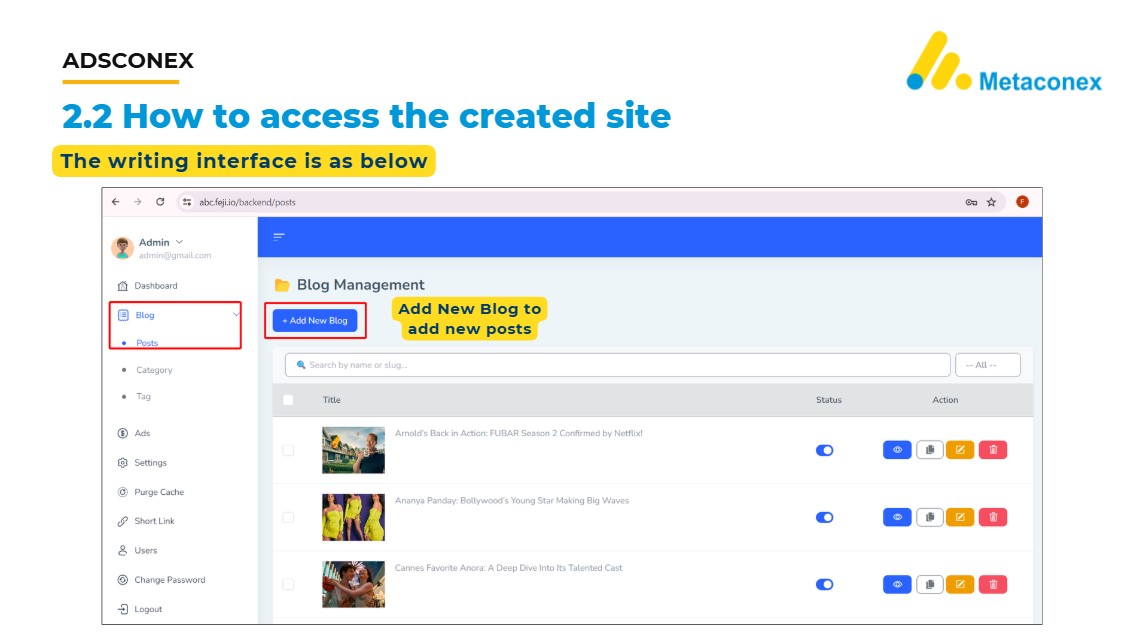
Step 9: Access the Writing Interface
After your Blogbio site has been activated, you can start creating and managing posts through the writing interface.
- Open the Blog section
- In the left-hand sidebar menu of your dashboard, click on Blog.
- Go to Posts
- Select Posts to enter the Blog Management page. This is where all of your articles will be listed.
- Add a New Blog Post
- On the Blog Management page, click + Add New Blog to begin writing.
- Write and Manage Content
- In the editor, you can add a blog title, write your content, and format it with images or links. This area also allows you to edit, update, or delete existing posts, giving you full control over your blog.
From here, your Blogbio site is ready to grow — you can start publishing articles, sharing ideas, and building an online presence.
Creating a blog with Blogbio is a straightforward process that anyone can complete, even without technical skills. From registering an account and setting up your domain to accessing the writing interface and publishing your first post, Blogbio provides all the essential tools you need to start blogging for free.
By following the step-by-step guide above, you now have a fully functional blog that can be customized, optimized, and updated with fresh content anytime. Whether your goal is to share personal stories, build a professional brand, or grow a business presence online, Blogbio makes it simple and accessible.
With your Blogbio site live, you’re now ready to start writing, connecting with readers, and building your online identity.